13 KiB
DIY Kubernetes
If you are looking for a little more of a challenge, or just don't have the money to fork out to managed Kubernetes, you're in luck.
Kubernetes provides many ways to run a cluster, by far the simplest method is with minikube but there are other methods like k3s and using drp to deploy a cluster.
After all, DIY its in our DNA.
Ingredients
- Basic knowledge of Kubernetes terms (Will come in handy) Start
- Some Linux machines (Depends on what recipe you follow)
Minikube
First, what is minikube?
Minikube is a method of running Kubernetes on your local machine.
It is mainly targeted at developers looking to test if their application will work with Kubernetes without deploying it to a production cluster. For this reason,
I do not recommend running your cluster on minikube as it isn't designed for deployment, and is only a single node cluster.
If you want to use minikube, there is a guide below but again, I recommend using something more production-ready like k3s or drp
Ingredients
- A Fresh Linux Machine
- Some basic Linux knowledge (or can just copy-paste)
!!! note
Make sure you are running a SystemD based distro like Ubuntu.
Although minikube will run on macOS and Windows,
they add in additional complexities to the installation as they
require running a Linux based image running in a VM,
that although minikube will manage, adds to the complexities. And
even then, who uses Windows or macOS in production anyways? 🙂
If you are serious about running on windows/macOS,
check the official MiniKube guides
here
Installation
After booting yourself up a fresh Linux machine and getting to a console, you can now install minikube.
Download and install our minikube binary
curl -LO https://storage.googleapis.com/minikube/releases/latest/minikube-linux-amd64
sudo install minikube-linux-amd64 /usr/local/bin/minikube
Now we can boot up our cluster
sudo minikube start --vm-driver=none
#Start our minikube instance, and make it use the machine to host the cluster, instead of a VM
sudo minikube config set vm-driver none #Set our default vm driver to none
You are now set up with minikube!
!!! warning MiniKube is not a production-grade method of deploying Kubernetes
K3S
What is k3s?
K3s is a production-ready method of deploying Kubernetes on many machines,
where a full Kubernetes deployment is not required, AKA - your cluster (unless your a big SaaS company, in that case, can I get a job?).
Ingredients
- A handful of Linux machines (3 or more, virtualized or not)
- Some Linux knowledge.
- Patience.
Setting your Linux Machines up
Firstly, my flavour of choice for deployment is Ubuntu Server, although it is not as enterprise-friendly as RHEL (That's Red Hat Enterprise Linux for my less geeky readers) or CentOS (The free version of RHEL). Ubuntu ticks all the boxes for k3s to run on and allows you to follow lots of other guides on managing and maintaining your Ubuntu server.
Firstly, download yourself a version of Ubuntu Server from here (Whatever is latest) Then spin yourself up as many systems as you need with the following guide
!!! note
I am running a 3 node cluster, with nodes running on Ubuntu 19.04, all virtualized with VMWare ESXi
Your setup doesn't need to be as complex as mine, you can use 3 old Dell OptiPlex if you really want 🙂
-
Insert your installation medium into the machine, and boot it.
-
Select your language
-
Select your keyboard layout
-
Select
Install Ubuntu -
Check and modify your network settings if required, make sure to write down your IPs
-
Select Done on Proxy, unless you use a proxy
-
Select Done on Mirror, as it has picked the best mirror for you unless you have a local mirror you want to use (in that case you are uber-geek)
-
Select
Use An Entire Diskfor Filesystem, and basically hit enter for the rest of the disk setup, just make sure to read the prompts and understand what you are doing -
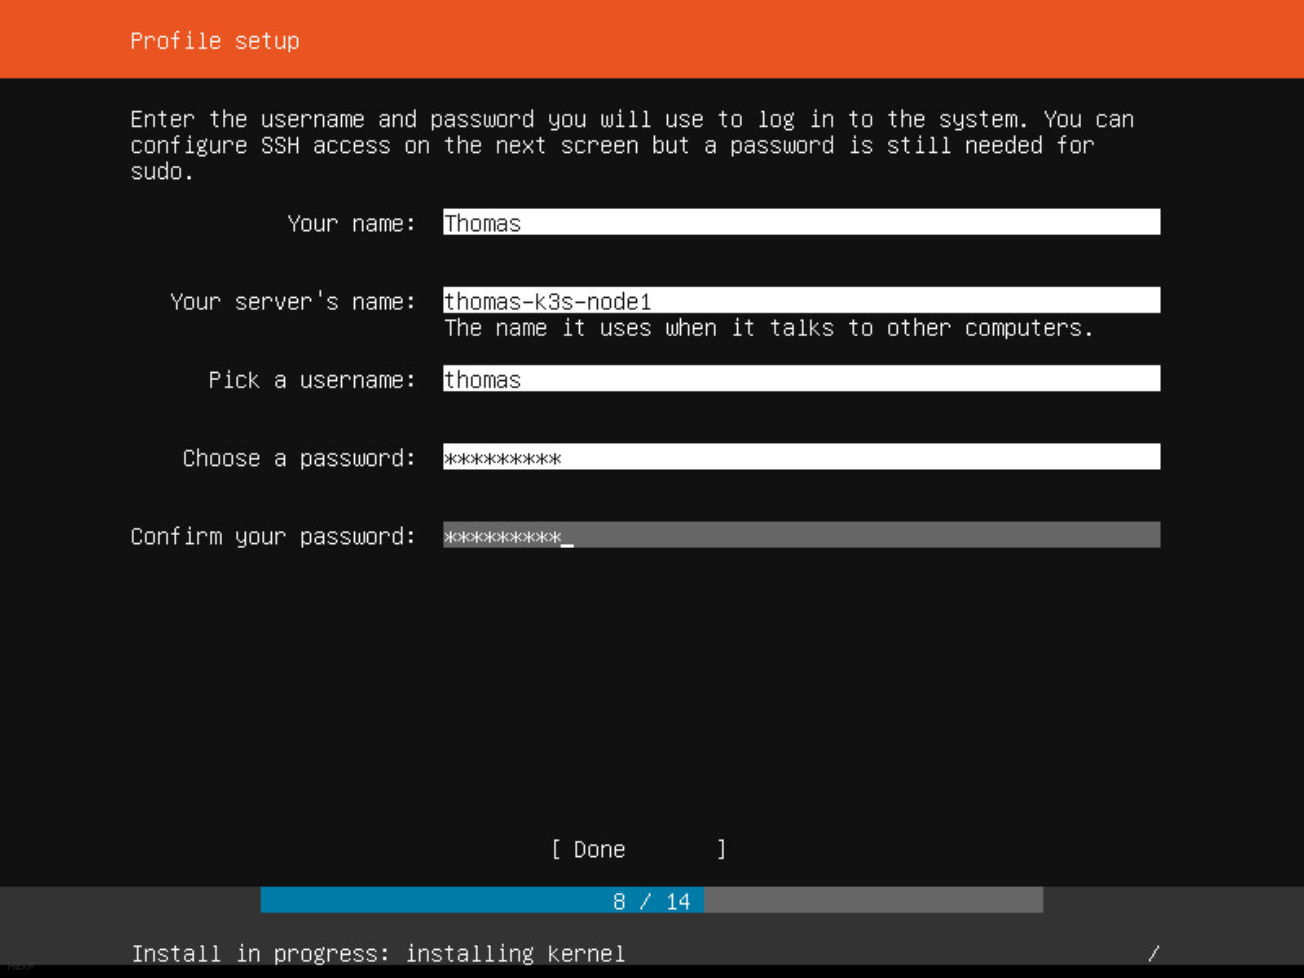
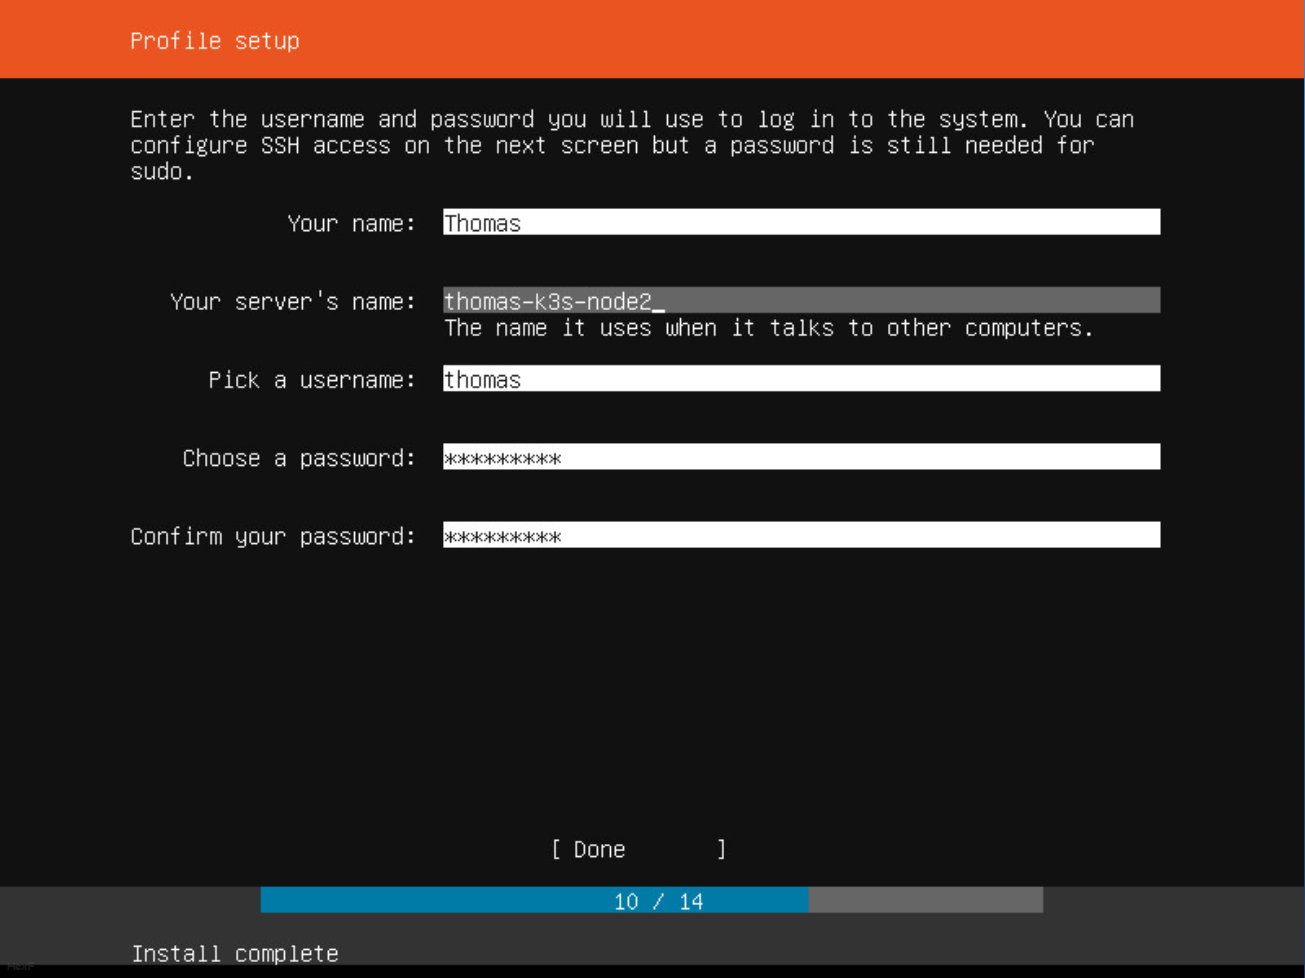
Now that you are up to setting up the profile, this is where things change. You are going to want to set up the same account on all the machines, but change the server name just a tad every time.
-
Now install OpenSSH on the server, if you wish to import your existing SSH key from GitHub or Launchpad, you can do that now and save yourself a step later.
-
Skip over Featured Server snaps by clicking
Done -
Wait for your server to install everything and drop you to a Linux prompt
-
Repeat for all your nodes


Pre-installation of k3s
For the rest of this guide, you will need some sort of Linux/macOS based terminal. On Windows you can do this with Windows Subsystem for Linux (WSL) see here for information on WSL.
The rest of this guide will all be from your local terminal.
If you already have an SSH key generated or added an existing one, skip this step.
From your PC,run ssh-keygen to generate a public and private key pair
(You can use this instead of typing your password in every time you want to connect via ssh)
$ ssh-keygen
Generating public/private rsa key pair.
Enter file in which to save the key (/home/thomas/.ssh/id_rsa): [enter]
Enter passphrase (empty for no passphrase): [password]
Enter same passphrase again: [password]
Your identification has been saved in /home/thomas/.ssh/id_rsa.
Your public key has been saved in /home/thomas/.ssh/id_rsa.pub.
The key fingerprint is:
...
The key's randomart image is:
...
If you have already imported a key from GitHub or Launchpad, skip this step.
$ ssh-copy-id [username]@[hostname]
/usr/bin/ssh-copy-id: INFO: Source of key(s) to be installed: "/home/thomas/.ssh/id_rsa.pub"
The authenticity of host 'thomas-k3s-node1 (theipaddress)' can't be established.
ECDSA key fingerprint is SHA256:...
Are you sure you want to continue connecting (yes/no)? yes
/usr/bin/ssh-copy-id: INFO: attempting to log in with the new key(s), to filter out any that are already installed
/usr/bin/ssh-copy-id: INFO: 1 key(s) remain to be installed -- if you are prompted now it is to install the new keys
thomas@thomas-k3s-node1's password: [insert your password now]

Number of key(s) added: 1
You will want to do this once for every machine, replacing the hostname with the other next nodes hostname each time.
!!! note
If your hostnames aren't resolving correct, try adding them to your /etc/hosts file
Installation
If you have access to the premix repository, you can download the ansible-playbook and follow the steps contained in there, if not sit back and prepare to do it manually.
!!! tip
Becoming a patron will allow you to get the ansible-playbook to setup k3s on your own hosts. For as little as 5$/m you can get access to the ansible playbooks for this recipe, and more!
See funkypenguin's Patreon for more!
Select one node to become your master, in my case thomas-k3s-node1.
Now SSH into this node, and run the following:
localpc$ ssh thomas@thomas-k3s-node1
Enter passphrase for key '/home/thomas/.ssh/id_rsa': [ssh key password]

thomas-k3s-node1$ curl -sfL https://get.k3s.io | sh -
[sudo] password for thomas: [password entered in setup]
[INFO]  Finding latest release
[INFO]  Using v1.0.0 as release
[INFO]  Downloading hash https://github.com/rancher/k3s/releases/download/v1.0.0/sha256sum-amd64.txt
[INFO]  Downloading binary https://github.com/rancher/k3s/releases/download/v1.0.0/k3s
[INFO]  Verifying binary download
[INFO]  Installing k3s to /usr/local/bin/k3s
[INFO]  Creating /usr/local/bin/kubectl symlink to k3s
[INFO]  Creating /usr/local/bin/crictl symlink to k3s
[INFO]  Creating /usr/local/bin/ctr symlink to k3s
[INFO]  Creating killall script /usr/local/bin/k3s-killall.sh
[INFO]  Creating uninstall script /usr/local/bin/k3s-uninstall.sh
[INFO]  env: Creating environment file /etc/systemd/system/k3s.service.env
[INFO]  systemd: Creating service file /etc/systemd/system/k3s.service
[INFO]  systemd: Enabling k3s unit
Created symlink /etc/systemd/system/multi-user.target.wants/k3s.service → /etc/systemd/system/k3s.service.
[INFO]  systemd: Starting k3s
Before we log out of the master, we need the token from it.
Make sure to note this token down
(please don't write it on paper, use something like notepad or vim, it's ~100 characters)
thomas-k3s-node1$ sudo cat /var/lib/rancher/k3s/server/node-token
K1097e226f95f56d90a4bab7151...
Make sure all nodes can access each other by hostname, whether you add them to /etc/hosts or to your DNS server
Now that you have your master node setup, you can now add worker nodes
SSH into the other nodes, and run the following making sure to replace values with ones that suit your installation
localpc$ ssh thomas@thomas-k3s-node2
Enter passphrase for key '/home/thomas/.ssh/id_rsa': [ssh key password]

thomas-k3s-node2$ curl -sfL https://get.k3s.io | K3S_URL=https://thomas-k3s-node1:6443 K3S_TOKEN=K1097e226f95f56d90a4bab7151... sh -
Now test your installation!
SSH into your master node
ssh thomas@thomas-k3s-node1
Enter passphrase for key '/home/thomas/.ssh/id_rsa': [ssh key password]

thomas-k3s-node1$ sudo kubectl get nodes

NAME                STATUS   ROLES    AGE     VERSION
thomas-k3s-node1    Ready    master   15m3s   v1.16.3-k3s.2
thomas-k3s-node2    Ready    <none>   6m58s   v1.16.3-k3s.2
thomas-k3s-node3    Ready    <none>   6m12s   v1.16.3-k3s.2
If you got Ready for all your nodes, Well Done! Your k3s cluster is now running! If not try getting help in our discord.
Post-Installation
Now you can get yourself a kubeconfig for your cluster. SSH into your master node, and run the following
localpc$ ssh thomas@thomas-k3s-node1
Enter passphrase for key '/home/thomas/.ssh/id_rsa': [ssh key password]

thomas-k3s-node1$ sudo kubectl config view --flatten
apiVersion: v1
clusters:
- cluster:
    certificate-authority-data: LS0tLS1CRUdJTiBD...
    server: https://127.0.0.1:6443
  name: default
contexts:
- context:
    cluster: default
    user: default
  name: default
current-context: default
kind: Config
preferences: {}
users:
- name: default
  user:
    password: thisishowtolosecontrolofyourk3s
    username: admin
Make sure to change clusters.cluster.server to have the master node's name instead of 127.0.0.1, in my case making it https://thomas-k3s-node1:6443
!!! warning This kubeconfig file can grant full access to your Kubernetes installation, I recommend you protect this file just as well as you protect your passwords
You will probably want to save this kubeconfig file into a file on your local machine, say my-k3s-cluster.yml or where-8-hours-of-my-life-went.yml.
Now test it out!
localpc$ kubectl --kubeconfig=my-k3s-cluster.yml get nodes
NAME                STATUS   ROLES    AGE     VERSION
thomas-k3s-node1    Ready    master   495m    v1.16.3-k3s.2
thomas-k3s-node2    Ready    <none>   488m    v1.16.3-k3s.2
thomas-k3s-node3    Ready    <none>   487m    v1.16.3-k3s.2
That is all! You have yourself a Kubernetes cluster for you and your dog to enjoy.
DRP
DRP or Digital Rebar Provisioning Tool is a tool designed to automatically setup your cluster, installing an operating system for you, and doing all the configuration like we did in the k3s setup.
This section is WIP, instead, try using the K3S guide above 🙂
Where from now
Now that you have wasted half a lifetime on installing your very own cluster, you can install more to it. Like a load balancer!
- Start - Why Kubernetes?
- Design - How does it fit together?
- Cluster (this page) - Setup a basic cluster
- Load Balancer - Setup inbound access
- Snapshots - Automatically backup your persistent data
- Helm - Uber-recipes from fellow geeks
- Traefik - Traefik Ingress via Helm
About your guest chef
This article, believe it or not, was not diced up by your regular chef (funkypenguin). Instead, today's article was diced up by HexF, a fellow kiwi (hence a lot of kiwi references) who enjoys his sysadmin time. Feel free to talk to today's chef in the discord, or see one of his many other links that you can follow below
--8<-- "recipe-footer.md"